


Growing your own fruits and vegetables is beneficial to your health for many reasons. It encourages you and your family to eat more fresh produce. You get to decide if you want to use fertilizers and pesticides, and if so, which ones. It also lets you control when to harvest your food; vegetables that ripen in the garden have more nutrients than some store-bought vegetables that must be picked early.

That being said, Qatar’s climate and soil do not provide ideal conditions for growing many kinds of fruits and vegetables. The hot weather is tougher on plants than it is on people. It’s easy to understand why when you consider that our bodies contain about 60 per cent water and most plants are 85 to 90 per cent water. So when temperatures rise, plants get even thirstier than we do. As with people, some plants tolerate the heat better than others. Knowing which plants like it hot and which do not will help your garden survive—and even thrive—in hot weather.
Tomatoes, peppers, eggplant and melons are crops that do fairly well in a hot climate like Qatar. As long as they don’t run out of water, these sun-worshippers are well equipped to survive the heat. On hot days, they conserve energy and moisture by slowing down. While resting, their foliage may appear to wilt from the lack of water, but as the evening approaches, they’ll perk up again. Heat-loving plants are thirsty—the average tomato plant needs more than 30 gallons of water in a season.
If you’ve been thinking about starting your own garden, here are a few tips to get you started:
1. Select your garden patch
Make sure your vegetable patch is an area that isn’t crowded by trees and gets plenty of sunlight. If you don’t have a backyard in which to plant, you can still grow your own vegetables and herbs in planters. The area should get about 8 to 10 hours of sunlight a day for best results, and no less than 6 hours. However, if the sunlight is too intense, it might scorch the tender foliage. In that case, gardeners.com suggests using shade netting. It will keep the soil and the air temperature as much as 10 degrees cooler and will reduce moisture loss. Suspend the shade netting several inches above your crops.

2. Prepare your soil
According to the Doha Garden Club’s planning calendar, September is the right time to till the soil prior to planting, but don’t let this put you off if you’re only starting now. It will take a little extra work and you may have to plant a little later in the season. If you’re using planters then all you need is a good potting mix, available at your local nursery.
Soil is essentially a collection of mineral particles of different sizes. If most particles are large (sand), water passes through rapidly. Adding compost or organic matter to your soil will improve texture, fertility and drainage. If your plot has not been planted before, you may have the extra work of removing rocks and boulders. Be prepared to find all sorts of scrap and junk as you work the soil. Topsoil, which is available locally, can be tilled and mixed in evenly. Continue to do so until the soil is as fine as possible.
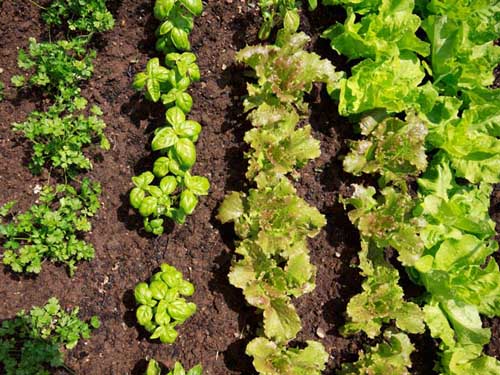
3. Plan your plot
Plan which vegetables and herbs you want to add to your garden. Choose varieties that are native to the Middle East or similar climates. A local nursery should be able to advise you. Take advantage of the characteristics of your site, such as sun, shade, wind and soil. Check the back of the seed packets for how much spacing each of your vegetables will need and group plants by their water needs. Add enough of each to fit your prepared garden site, and then you’re ready to grow.
Ruth Martinez Sabry, a Doha-based “green thumb,” buys her seeds from nurseries, supermarkets or the Omani Souq. She says, “They have varieties of Asian seedlings coming from India and Sri Lanka”—which grow well in Qatar’s climate.
Sabry prefers sweet potatoes, cassava, papaya, lemon grass and gourd. Another local gardening enthusiast, Nadia Hassan, claims her biggest fail was trying to grow carrots, as they did not grow bigger than one inch. Her tomatoes and eggplant, though, are a huge success. Other gardeners have reported success with melons, broccoli, spinach, beans, radishes, lettuce and herbs such as basil, mint and coriander.
4. Sow your seeds
When the temperature falls below 30 degrees Celsius (around this time of year), it is time to sow the seeds. Tomatoes, lettuce, cabbage, cauliflower, okra, papaya and chillies are great to start with. If you want to plant directly into the ground, make sure the soil is moist, sow them about half an inch deep or scatter the seeds thinly over a patch.

Take care when you water your soil after planting the seeds. Sabry suggests watering the soil thoroughly two hours before planting your seeds. “If you water the soil afterwards, you may disturb the seeds,” she says.
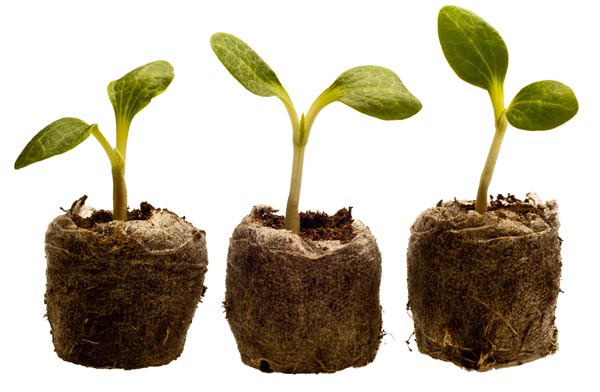
You can also plant in seed trays and then transplant when the seeds germinate. Sabry uses egg cartons and yoghurt cups to grow her seedlings instead of seed trays. “Make sure you label your seeds! You will never remember all the vegetables you planted, so label every single cell,” she recommends.
When it comes time to transplant, make sure you water the seedlings until the root ball is completely soaked 24 hours before planting. The best time to plant your seedlings is in the afternoon, after sunset, when the heat of the day is diminishing.
“And finally,” Sabry says, “be patient: it takes at least three weeks for your seedlings to sprout and show some leaves.”
5. Watch and nurture
Watch your garden carefully. As with almost everything in life, a little TLC will go a long way. Prune if necessary, and keep an eye out for disease or insect damage. Unfortunately, your vegetable garden will most probably attract some unwanted guests. Sabry has some tips on how to deal with them, without using pesticides. “Aphids, or plant lice, can be treated with a mixture of garlic, soaked in 10 ml of mineral oil. Strain the mixture; add 600 ml of water and 5 ml of a liquid dishwashing detergent. Try on one leaf first; if the plant responds well to the treatment (and the plant lice take a hike) go ahead and spray the affected area. If not, dilute a bit more and try again. Slugs are also unwanted guests in your garden. Crush eggshells and spread them around your plants. Add citrus rinds to the mixture.”
6. Water, feed and weed
Keep watering, but if the temperature drops, the plants need less water. Check the soil by sticking your finger one inch below the surface of the soil. If it feels dry, provide water. Water thoroughly to moisten all the soil and allow it to dry before watering again. Fertilize at regular intervals, using a water-soluble formula every 10 to 14 days to provide plants with the nutrients needed to grow.
The most dreaded task of all is weeding, but it must be done. As long as they are young, you can easily pull them out of your garden. Once the weeds go to seed, though, you will have to fight them for years to come.
If you are willing to invest in drip irrigation and soaker hoses, these will make watering easier, help to limit the weed growth and minimize evaporation loss. You could also use mulch to retain water, block those thirsty weeds and reduce evaporation. A 6-8 inch (15-20 cm) layer of mulch can cut water needs in half. Naturally derived mulch, like wood chips (rather than rubber bits), retains some water and increases the humidity level around plants. Remember, healthy plants need less water, fertilizer and pest control than stressed plants. By keeping on top of tasks—weeding, pruning and thinning, monitoring pests—you’ll water less frequently.
7. Garden bounty
In February your cauliflower, squash and eggplant should be ready to harvest. Herbs like parsley, coriander and mint are also at their best. Tomatoes and cabbage need a bit longer, but should be ready to eat by March. Be careful: as temperatures rise, you need to water more frequently.

Some people claim there is nothing more relaxing than digging in the earth with your bare hands. True as that may be, none of us like the dirt that remains under the fingernails, especially after weeding. Luckily, Sabry has an expert tip for us: “Draw your finger nails across a bar of soap before you start working in the garden. This seals the underside of your nails so dirt can’t collect beneath them. After you finish, just use a nail brush to remove the soap.”
Just let it grow!
Whether you’re looking to grow your own vegetables and herbs because you want to eat more consciously or just try a new hobby, don’t be afraid to dig in and get your hands a little dirty. As long as you plan, prepare and are willing to put in the time and the effort, you can turn your backyard or patio into
a lovely little vegetable oasis!
TESSA KERKVLIET-OLDEWARRIS HAS LIVED IN QATAR FOR ALMOST THREE YEARS AFTER MOVING TO DOHA FROM THE NETHERLANDS WITH HER HUSBAND AND THREE SONS. SHE IS AN ENGLISH/DUTCH TRANSLATOR AND PREVIOUSLY WORKED AS A MEDICAL LIBRARIAN IN A HOSPITAL WITH AN EMPHASIS ON TEACHING RESEARCH SKILLS TO MEDICAL STUDENTS.


