


Sponsored by King’s College Doha
Did you know that you can make butter from home?
The science of butter
Cream consists mainly of water and fat. Butter is made from the fat in cream. Fat does not dissolve in water, so it is held in a suspension. It’s hard to tell when you look at cream, but the fat is actually floating as little globules in the cream—imagine lots of fat-filled balloons. These globules help make cream thick.
When you shake cream, these fat balloons bump into one another and break, combining the fat into bigger globules. The more you shake, the bigger the globule, and because fat does not dissolve in water, the fat, or butter, stays separate.
This experiment should take around 15 minutes. You need strong arms to shake the jar so enlist someone to help in case you get tired.


Equipment
- 250ml of double cream, heavy cream or whipping cream; any brand will do, but you want at least 36% butterfat
- A clean, 500ml-volume jar with a tight-fitting lid; glass works best
- Two containers to store the milk and buttermilk
- Pinch of salt
Method
Step 1
Pour the cream into the jar. It should be no more than halfway filled.
Step 2
Secure the lid and turn upside down over the sink to make sure there are no leaks. You wil
Step 3
Turn on your favourite upbeat music and dance, dab, floss and shake. Make sure your dancing involves shaking the jar vigorously!
Step 4
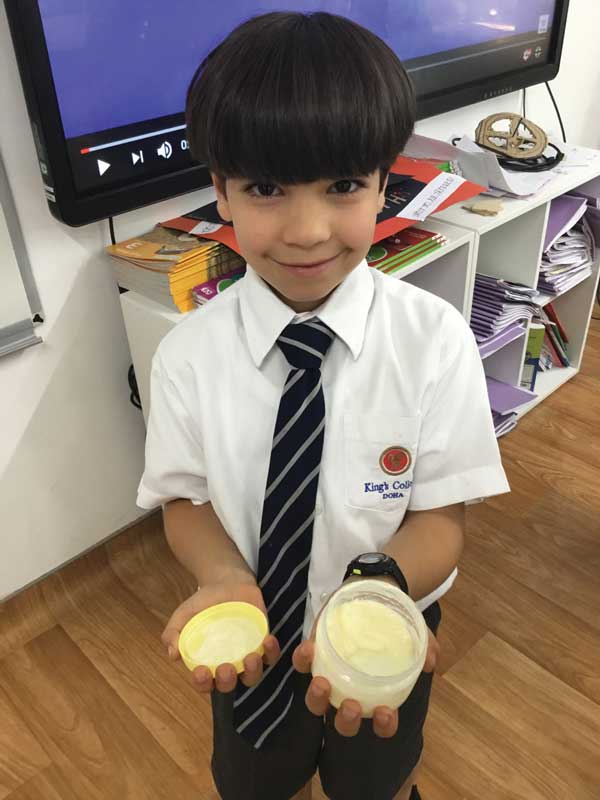
After dancing for about 8–10 minutes, open up your jar to check on your butter. You should see a big lump of yellow butter in the middle. If you can’t see this yet, you will need to resume dancing for another five minutes. The butter is ready when you see a bright yellow solid glob swimming in a pale liquid—this is the buttermilk.
Step 5
Carefully pour the buttermilk into one of the storage containers. This can be used to make pancakes and cookies, or you can drink it.
Step 6
Now just the butter should be left in the bottom of your jar. Using a spoon, press the butter to remove any extra liquid, making sure to save any excess liquid in the first container.
Step 7
Add a pinch of salt to your butter and mix it well. Place the butter in the second container and press it down to the bottom. Place both containers in the refrigerator.

The butter will be ready to eat once it has chilled, usually a few hours. Both the buttermilk and the butter should keep in the fridge for a few weeks.
And that’s it! Smooth, creamy, delicious homemade butter all from shaking cream in a jar! How cool is that?
Get creative
Butter stamps were a traditional way of marking butter. Create your own butter mark by making a potato stamper—maybe a flower or your initials? Dip the stamp in cold water then press it onto the butter before you refrigerate it
ZAHRA WORKS AS THE HEAD OF SCIENCE AT KING’S COLLEGE DOHA TEACHING SCIENCE TO YEAR 3 AND ABOVE. SHE LOVES CREATING OPPORTUNITIES TO GENERATE THOSE ‘OOH’ AND ‘AAH’ MOMENTS IN HER LESSONS. SHE KNOWS THESE MOMENTS MOTIVATE HER PUPILS TO EXTEND THEIR LEARNING BEYOND THE CLASSROOM AND HOPEFULLY ASPIRE TO BECOME THE SCIENTISTS OF THE FUTURE.
ENROL NOW FOR ACADEMIC YEAR 2019/2020 AT KINGSCOLLEGEDOHA.COM


